こんにちは、nakamuraです。 securityって大事ですよね。少し前からRailsで2要素認証ってどうやるんだろうと気になっていたので、google-authenticator-railsを使ってどんな風に実装できるのか試してみました。基本的には google-authenticator-rails Readmeに記載してある通りに実装していけばOKでした。
Gemをインストール
はじめに、Gemfileにgoogle-authenticator-railsを追記し、bundle installを実行します。
gem 'google-authenticator-rails'
Userモデルを作成
次に、Userモデルにgoogle-authenticator-railsで必要なカラムを追加します。 通常は、passwordカラムなど他にもカラムがあると思いますが、今回はお試しなので、割愛します。
$ rails g model user email:string google_secret:string
Userクラスにacts_as_google_authenticatedを設定します。 これで、google-authenticator-railsのメソッドが使えるようになります。
class User < ApplicationRecord
  acts_as_google_authenticated
end
Readme によるとGoogleAuthenticatorRailsはアカウント区別するためにlabelが必要とのことで、デフォルトではemailカラムを使用しますが、他にもcolumn_nameオプションで別カラムを指定したり、procでカスタマイズも可能とのこと。とりあえず、今回はデフォルトを使用します。
そうすると、下記のように、User#set_google_secret でUserモデルのgoogle_secretカラムに値が設定され、User#google_qr_uri メソッドでQRコードが表示できるようになります。
Loading development environment (Rails 5.2.3)
irb(main):001:0> user = User.new
irb(main):002:0> user.email = "test@example.com"
irb(main):003:0> user.set_google_secret
irb(main):004:0> user.google_qr_uri
=> "https://chart.googleapis.com/chart?cht=qr&chl=otpauth%3A%2F%2Ftotp%2FTEST%2520MY%2520APP%3Atest%40example.com%3Fsecret%3Dedotpifgivmj2lmf%26issuer%3DTEST%2BMY%2BAPP&chs=200x200"
irb(main):005:0>
サンプルアプリの作成
それでは、以降で、簡単なQRコードを表示して、スマホアプリのGoogleAuthenticatorでコードが表示されるところまで実装して行きたいと思います。 まず、Userモデルを下記のように書き換えます。本来であれば、 validationなども定義しないとですが、今回は割愛します。
class User < ApplicationRecord
  acts_as_google_authenticated drift: 10, issuer: 'TEST MY APP'
  after_create { |record| record.set_google_secret }
end
driftはアプリで表示されたコードを何秒間遅延して許容するかどうかの設定とのことで、デフォルトは5秒とのこと。issuerはアプリで表示される発行元の名称です。
次に、UserMfaSessionモデルを作成します。 Readmeにある通り、GoogleAuthenticatorRails::Session::Base継承し、コードの記載は不要です。
# app/models/user_mfa_session.rb

class UserMfaSession < GoogleAuthenticatorRails::Session::Base
  # no real code needed here
end
次に、コントローラーを作成します。
User#google_authentic? でフォームに設定されたコードが正しいかを確認できるようになります。
# app/controllers/user_mfa_session_controller.rb

class UserMfaSessionsController < ApplicationController
  skip_before_action :check_mfa

  def new
    @user = current_user
  end

  def create
    @user = current_user # grab your currently logged in @user
    if @user.google_authentic?(params[:mfa_code])
      UserMfaSession.create(@user)
      redirect_to root_path
    else
      flash[:error] = "Wrong code"
      render :new
    end
  end
end
そして、#check_mfaメソッドを記載し、認証が済んでいない場合は、認証ページにリダイレクトさせます。
# app/controllers/application_controller.rb

class ApplicationController < ActionController::Base
  before_action :check_mfa

  private
  def check_mfa
     if !(user_mfa_session = UserMfaSession.find) && (user_mfa_session ? user_mfa_session.record == current_user : !user_mfa_session)
      redirect_to new_user_mfa_session_path
    end
  end
end
認証ページは以下のように設定します。
# app/views/user_mfa_sessions/new.html.slim

img src="#{@user.google_qr_uri}"
br
= form_tag user_mfa_session_path, method: :post do
  .actions
    = text_field_tag :mfa_code
    = submit_tag 'authenticate'
Welcomeコントローラーを作成し、ルーティングを設定します。
# app/controllers/welcome_controller.rb

class WelcomeController < ApplicationController
  def index
  end

  def logout
    UserMfaSession.destroy
    redirect_to :root
  end
end
# config/routes.rb

Rails.application.routes.draw do
  root 'welcome#index'
  get 'logout' => 'welcome#logout'
  resource :user_mfa_session, only: %i(new create)
  resources :users
end
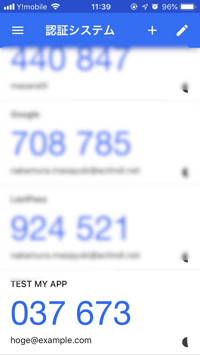
これで、localhost:3000にアクセスするとQRコードが表示されるので、アプリで読み込むと、下記のようにアプリでコードが表示されるようになります。

最後に
アクトインディでは、エンジニアを募集しています。 actindi.net
働きやすい環境で世の中に価値を残すことができるサービスを一緒に作りましょう!